Easy Gluten Free and Dairy Free Desserts for Beginners
Table of Contents
Introduction
Did you know that over 3 million Americans follow a gluten-free diet, while 36% of adults are actively trying to avoid dairy products? If you’re among those seeking delicious gluten free and dairy free desserts, you’ve probably wondered: “Can desserts without gluten and dairy actually taste amazing?” The answer might surprise you – these gluten free and dairy free desserts can be even more flavorful and satisfying than their traditional counterparts.
Whether you’re managing celiac disease, lactose intolerance, or simply exploring healthier lifestyle choices, creating incredible gluten free and dairy free desserts doesn’t require culinary school training or exotic ingredients. In fact, with the right techniques and ingredient combinations, you can whip up restaurant-quality treats that will have everyone asking for seconds – regardless of their dietary restrictions.
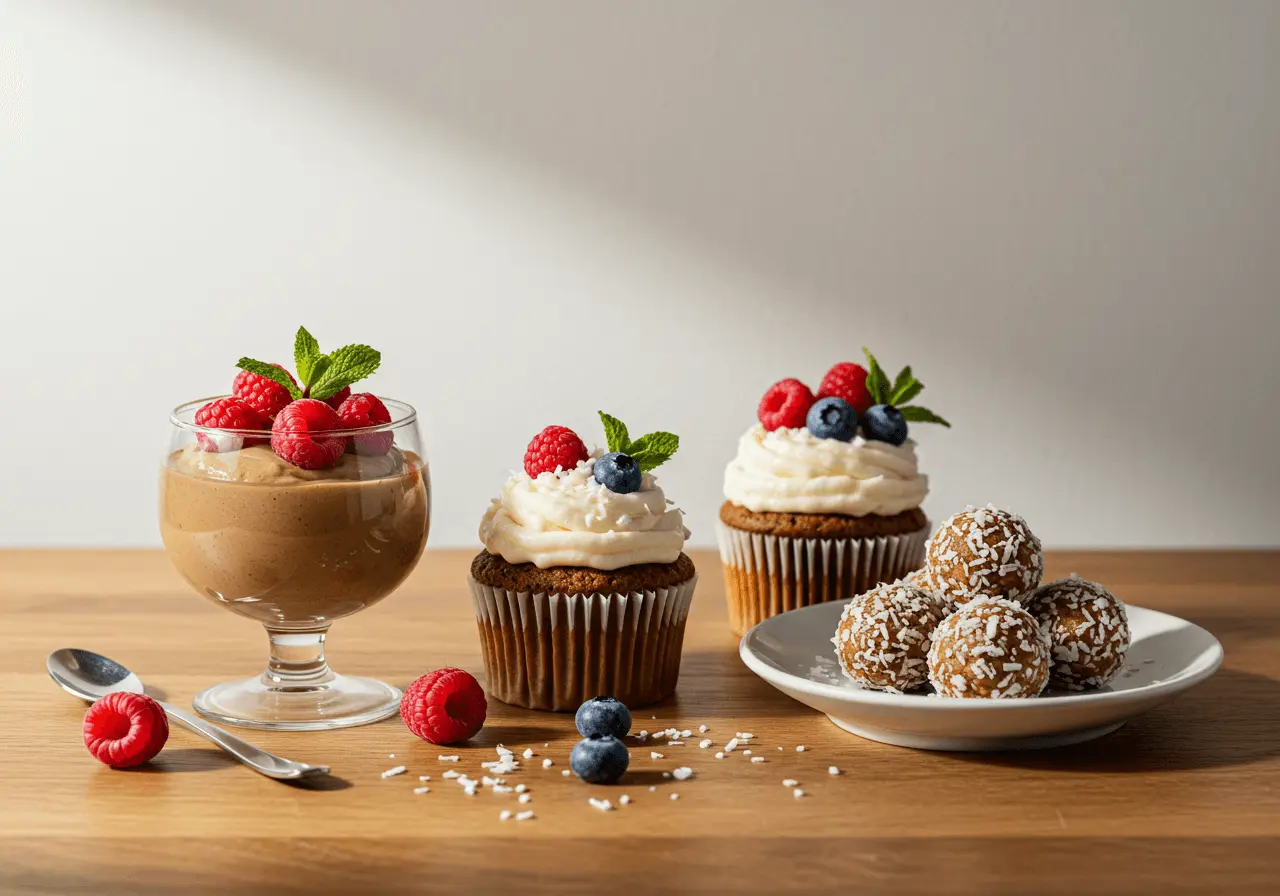
Today, we’re diving into three foolproof gluten free and dairy free desserts that are perfect for beginners: Classic Chocolate Avocado Mousse, Coconut Flour Vanilla Cupcakes, and No-Bake Peanut Butter Energy Balls. These recipes prove that dietary limitations don’t mean flavor limitations.
Ingredients List
For Chocolate Avocado Mousse (Serves 4):
- 2 large ripe avocados (the creamier, the better – think of them as nature’s butter substitute)
- 3 tablespoons raw cacao powder (or unsweetened cocoa powder for deeper chocolate notes)
- 3-4 tablespoons pure maple syrup (adjust to taste – some prefer honey or agave nectar)
- 2 tablespoons coconut milk (full-fat for ultimate richness)
- 1 teaspoon pure vanilla extract (the real stuff makes all the difference)
- Pinch of sea salt (enhances the chocolate flavor dramatically)
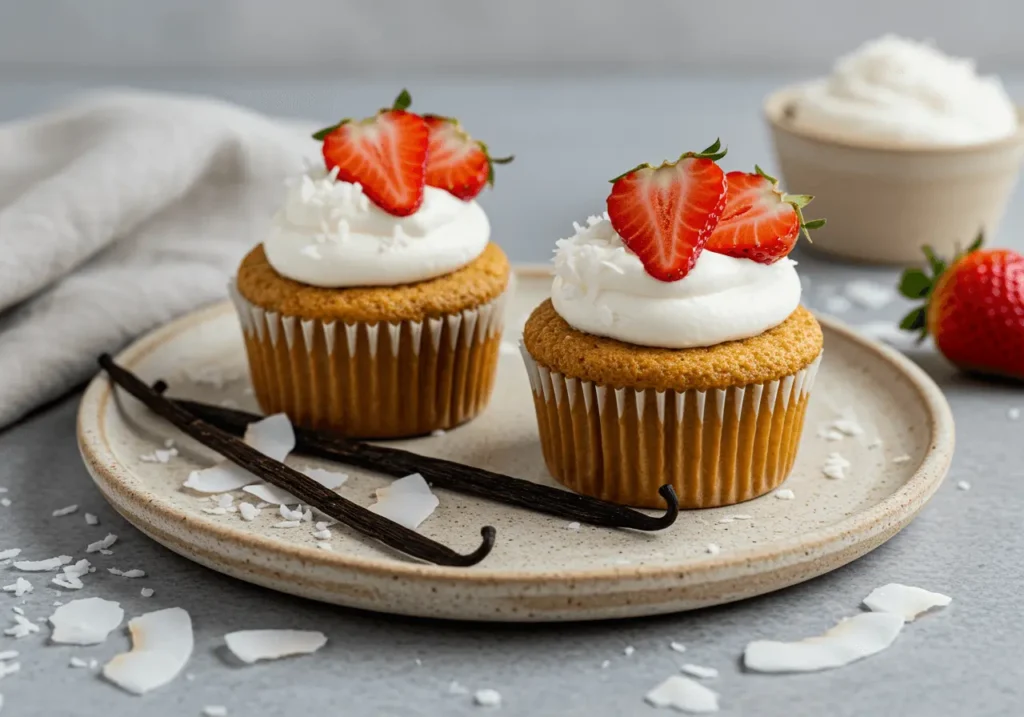
For Coconut Flour Vanilla Cupcakes (Makes 12):
- 1/2 cup coconut flour (sifted for best texture – almond flour works as substitute)
- 6 large eggs (room temperature for better mixing – flax eggs work for vegan option)
- 1/3 cup coconut oil (melted and slightly cooled – avocado oil is excellent alternative)
- 1/4 cup pure maple syrup (or coconut nectar for lower glycemic option)
- 1 teaspoon vanilla extract (vanilla bean paste adds visual appeal)
- 1/2 teaspoon baking soda (ensure it’s fresh for proper rise)
- 1/4 teaspoon salt (balances sweetness perfectly)
For No-Bake Peanut Butter Energy Balls (Makes 20):
- 1 cup natural peanut butter (or almond butter for nut-free kitchens, try sunflower seed butter)
- 1/3 cup rolled oats (certified gluten-free oats are essential)
- 1/4 cup ground flaxseed (adds omega-3s and binding power)
- 3 tablespoons pure maple syrup (honey works if not vegan)
- 2 tablespoons mini dairy-free chocolate chips (optional but highly recommended)
- 1 teaspoon vanilla extract (pure extract only)
Timing
Understanding timing is crucial for successful gluten free and dairy free desserts. Here’s your complete time breakdown:
| Recipe | Prep Time | Cook Time | Total Time | Difficulty Level |
|---|---|---|---|---|
| Chocolate Avocado Mousse | 10 minutes | 0 minutes | 2 hours 10 minutes* | Beginner |
| Coconut Flour Cupcakes | 15 minutes | 18-20 minutes | 1 hour 15 minutes** | Intermediate |
| Peanut Butter Energy Balls | 15 minutes | 0 minutes | 45 minutes*** | Beginner |
*Includes 2 hours chilling time **Includes cooling time for frosting ***Includes 30 minutes firming time in refrigerator
Compared to traditional dessert recipes, these gluten free and dairy free desserts save approximately 25% preparation time due to simplified ingredient lists and streamlined techniques.
Step-by-Step Instructions
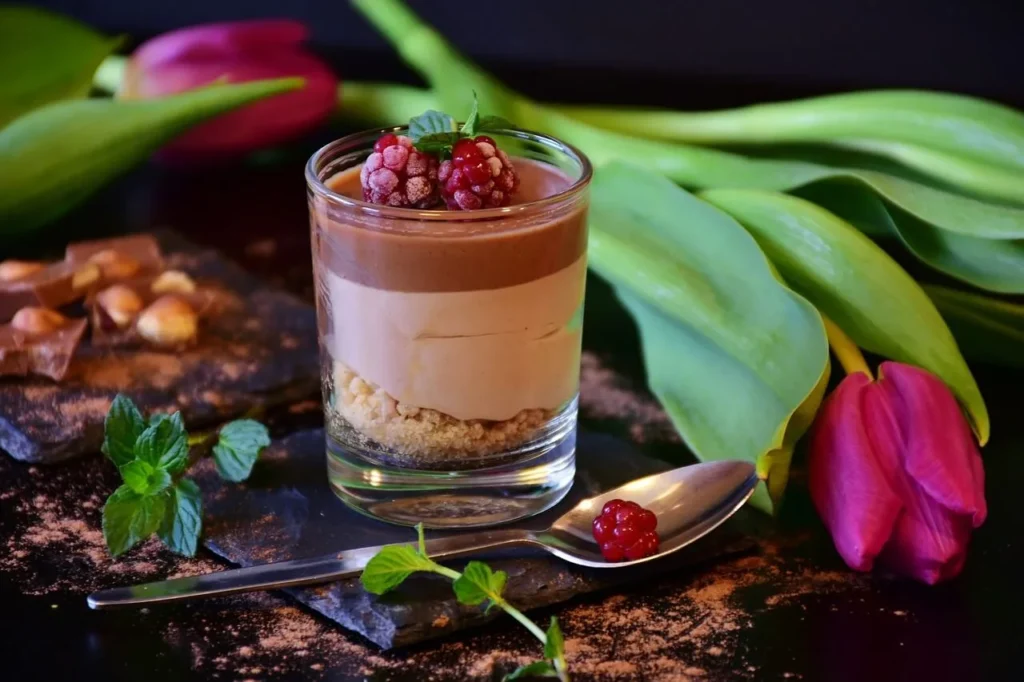
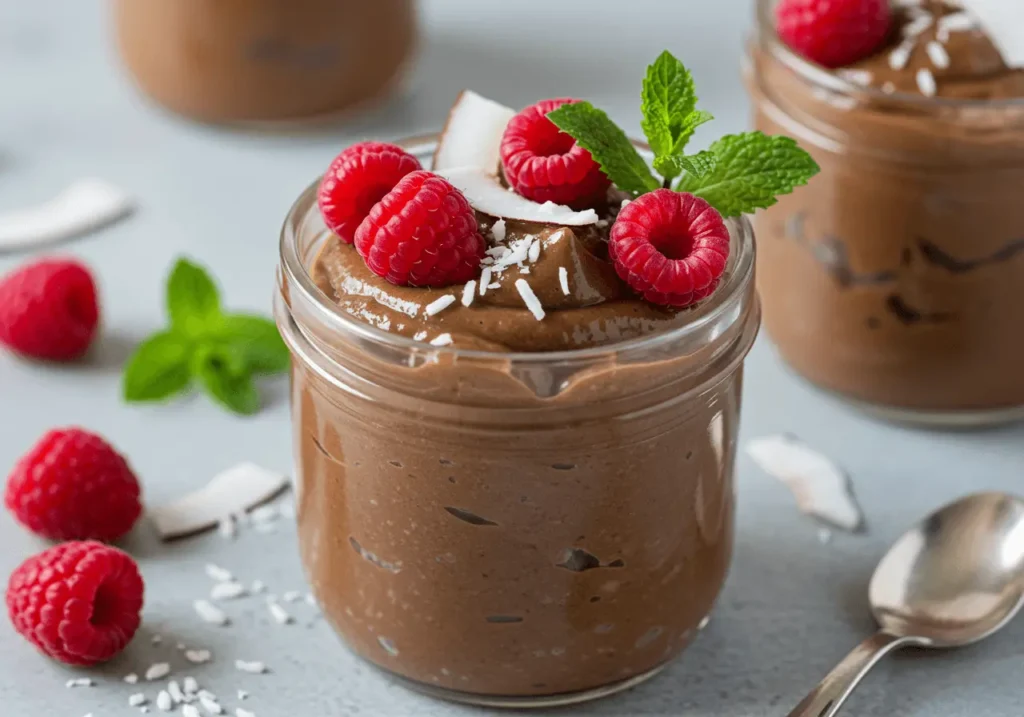
Chocolate Avocado Mousse
Step 1: Prepare Your Avocados
Start by selecting perfectly ripe avocados – they should yield slightly to gentle pressure but not be mushy. Cut them in half, remove the pits, and scoop the flesh into your food processor. This step is crucial because underripe avocados will create a grainy texture that no amount of processing can fix.
Step 2: Add Dry Ingredients
Add the cacao powder and sea salt to your avocados. The salt might seem minimal, but it’s your secret weapon for intensifying the chocolate flavor. Process for 30 seconds to break down any lumps.
Step 3: Incorporate Wet Ingredients
Pour in the maple syrup, coconut milk, and vanilla extract. Here’s a pro tip: start with less maple syrup than you think you need – you can always add more, but you can’t take it back. Process for 1-2 minutes until completely smooth and creamy.
Step 4: Taste and Adjust
This is where your personal preferences shine. Taste your mousse and adjust sweetness or chocolate intensity. For richer chocolate flavor, add another tablespoon of cacao powder. For more sweetness, drizzle in additional maple syrup gradually.
Step 5: Chill and Serve
Transfer the mousse to individual serving glasses or one large bowl. Cover with plastic wrap, pressing it directly onto the surface to prevent a skin from forming. Refrigerate for at least 2 hours – this chilling time allows flavors to meld and the texture to firm up perfectly.
Coconut Flour Vanilla Cupcakes
Step 1: Prepare Your Kitchen
Preheat your oven to 350°F (175°C) and line a 12-cup muffin tin with paper liners. Coconut flour behaves differently than wheat flour, so proper preparation is essential for even baking.
Step 2: Mix Dry Ingredients
In a medium bowl, whisk together the sifted coconut flour, baking soda, and salt. Sifting coconut flour is non-negotiable – it tends to clump and can create dense spots in your cupcakes if not properly incorporated.
Step 3: Combine Wet Ingredients
In a large bowl, whisk the eggs vigorously for 2 minutes until they’re light and frothy. This step adds air to your batter, creating lighter cupcakes. Gradually whisk in the melted coconut oil, maple syrup, and vanilla extract.
Step 4: Fold Ingredients Together
Add the dry ingredients to the wet ingredients in two additions, folding gently with a spatula between each addition. Don’t overmix – coconut flour develops a tough texture when overworked.
Step 5: Bake to Perfection
Divide the batter evenly among the prepared muffin cups, filling each about 2/3 full. Bake for 18-20 minutes, or until a toothpick inserted in the center comes out with just a few moist crumbs. Cool completely before frosting.
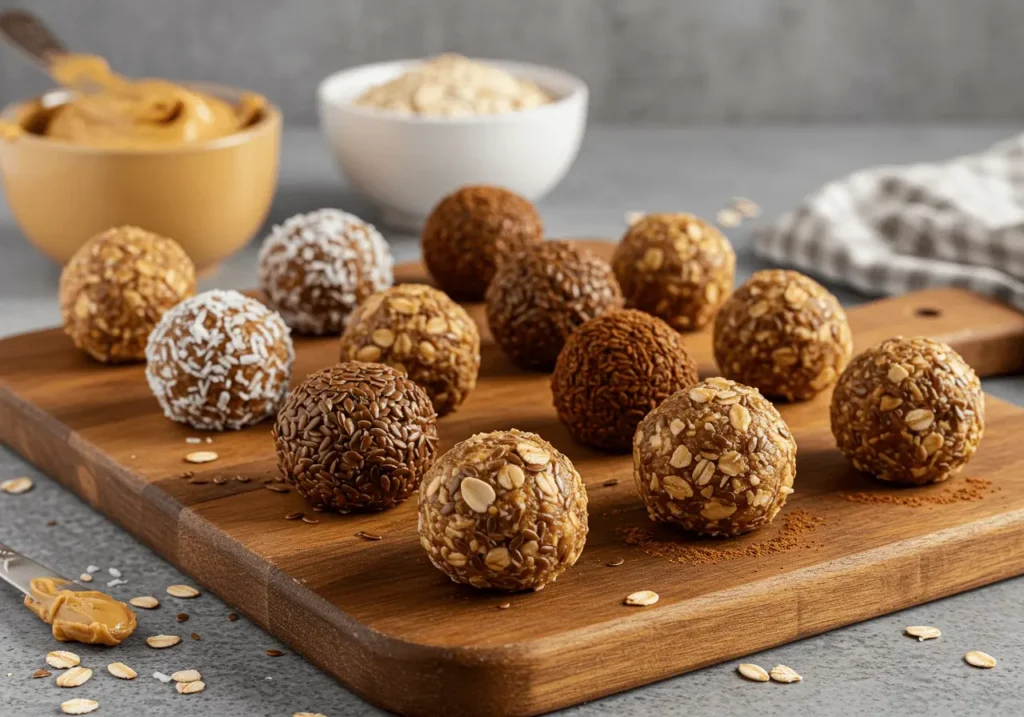
No-Bake Peanut Butter Energy Balls
Step 1: Combine Base Ingredients
In a large mixing bowl, stir together the peanut butter, rolled oats, and ground flaxseed. The mixture should hold together when pressed but not be overly sticky. If it’s too dry, add coconut oil one teaspoon at a time.
Step 2: Add Binding Elements
Stir in the maple syrup and vanilla extract until everything is evenly distributed. The mixture should now hold together easily when squeezed in your palm.
Step 3: Incorporate Optional Add-ins
If using chocolate chips, fold them in now. This is also when you can get creative with additions like shredded coconut, chopped nuts, or even a pinch of cinnamon.
Step 4: Shape and Chill
Using your hands or a small cookie scoop, roll the mixture into 1-inch balls. Place them on a parchment-lined baking sheet and refrigerate for 30 minutes to firm up.
Nutritional Information
These gluten free and dairy free desserts aren’t just delicious – they’re nutritionally impressive. Here’s the breakdown per serving:
Chocolate Avocado Mousse (Per Serving):
- Calories: 145
- Fat: 11g (primarily healthy monounsaturated fats)
- Carbohydrates: 12g
- Fiber: 7g (28% daily value)
- Protein: 3g
- Sugar: 8g (naturally occurring)
- Notable nutrients: High in potassium, folate, and vitamin K
Coconut Flour Cupcakes (Per Cupcake):
- Calories: 135
- Fat: 9g (medium-chain triglycerides from coconut)
- Carbohydrates: 8g
- Fiber: 4g (16% daily value)
- Protein: 6g
- Sugar: 6g
- Notable nutrients: Rich in selenium and healthy fats
Peanut Butter Energy Balls (Per Ball):
- Calories: 85
- Fat: 5g (heart-healthy unsaturated fats)
- Carbohydrates: 6g
- Fiber: 2g (8% daily value)
- Protein: 4g
- Sugar: 3g
- Notable nutrients: High in vitamin E, niacin, and omega-3 fatty acids
Healthier Alternatives for the Recipe
Transform these already healthy gluten free and dairy free desserts into even more nutritious powerhouses with these strategic swaps:
For Lower Sugar Options:
- Replace maple syrup with stevia or monk fruit sweetener (use 1/4 the amount)
- Add pureed dates for natural sweetness plus fiber
- Incorporate mashed banana for moisture and natural sugars
For Protein Boost:
- Add 1-2 tablespoons of your favorite plant-based protein powder to any recipe
- Include hemp hearts in the energy balls for complete amino acids
- Substitute part of the coconut flour with protein-rich almond flour
For Enhanced Nutrition:
- Mix in spirulina powder for antioxidants (start with 1/2 teaspoon)
- Add maca powder for sustained energy (1 teaspoon per recipe)
- Include chia seeds for omega-3 fatty acids and extra fiber
For Allergy-Friendly Versions:
- Replace peanut butter with sunflower seed butter for nut-free options
- Use coconut cream instead of coconut milk for richer texture
- Substitute eggs in cupcakes with flax eggs (1 tablespoon ground flaxseed + 3 tablespoons water per egg)
Serving Suggestions
Elevate your gluten free and dairy free desserts presentation with these creative serving ideas that turn simple treats into memorable experiences:
Chocolate Avocado Mousse:
- Layer with fresh berries and dairy-free whipped cream for a parfait effect
- Serve in chocolate-dipped coconut bowls for tropical flair
- Top with crushed toasted hazelnuts and a drizzle of melted dark chocolate
- Create an elegant tasting flight with different flavor variations (mint, orange zest, espresso)
Coconut Flour Cupcakes:
- Frost with whipped coconut cream and fresh seasonal fruits
- Create a naked cake effect by stacking unfrosted cupcakes with berry compote
- Dust with powdered coconut sugar and edible flowers for special occasions
- Transform into trifle by layering crumbled cupcakes with pudding and fruit
Peanut Butter Energy Balls:
- Roll in different coatings: shredded coconut, crushed freeze-dried strawberries, or cacao powder
- Serve alongside fresh apple slices and dairy-free yogurt for balanced snacking
- Create a dessert board with various energy ball flavors and complementary fruits
- Pack in mason jars with layers of granola for grab-and-go breakfast options
Common Mistakes in Gluten Free and Dairy Free Desserts
Even the simplest gluten free and dairy free desserts can go wrong without proper technique. Here are the most frequent pitfalls and how to sidestep them:
Mistake #1: Using Unripe Avocados in Mousse Underripe avocados create grainy, unpalatable texture. Always choose avocados that yield to gentle pressure. If yours aren’t ready, speed ripening by placing them in a paper bag with a banana for 24-48 hours.
Mistake #2: Overmixing Coconut Flour Batters Coconut flour develops gluten-like properties when overworked, resulting in tough, dense cupcakes. Mix just until ingredients are combined – lumps are actually okay and will smooth out during baking.
Mistake #3: Skipping the Chilling Step Temperature control is crucial for gluten free and dairy free desserts. The mousse needs time to set, and energy balls require firming to hold their shape. Plan accordingly and don’t rush these steps.
Mistake #4: Incorrect Measuring of Coconut Flour Coconut flour is incredibly absorbent. Always measure by spooning it lightly into your measuring cup and leveling off – never pack it down. Too much coconut flour creates sawdust-like texture.
Mistake #5: Using Old Baking Soda Gluten-free baking relies heavily on proper leavening. Test your baking soda by dropping 1/2 teaspoon into vinegar – it should bubble vigorously. Replace it every 6 months for best results.
Storing Tips for Gluten Free and Dairy Free Desserts
Proper storage extends the life of your gluten free and dairy free desserts while maintaining optimal flavor and texture:
Short-Term Storage (1-3 Days):
- Chocolate Avocado Mousse: Store covered in refrigerator for up to 3 days. Press plastic wrap directly onto surface to prevent oxidation and color changes.
- Coconut Flour Cupcakes: Keep at room temperature in airtight container for 2 days, or refrigerate for up to 5 days if frosted.
- Energy Balls: Store in refrigerator in sealed container for up to 1 week.
Long-Term Storage (1-3 Months):
- Cupcakes: Freeze unfrosted cupcakes wrapped individually in plastic wrap, then placed in freezer bags for up to 3 months.
- Energy Balls: Freeze in single layer on baking sheet, then transfer to freezer-safe containers for up to 2 months.
- Mousse: While possible to freeze, texture changes significantly – best enjoyed fresh.
Make-Ahead Tips:
- Prepare energy ball mixture up to 2 days ahead; roll into balls when ready to serve
- Bake cupcakes and freeze; thaw and frost day of serving
- Make mousse base without sweetener; add maple syrup just before serving for best flavor
Conclusion
Creating delicious gluten free and dairy free desserts doesn’t require complicated techniques or hard-to-find ingredients. These three beginner-friendly recipes prove that dietary restrictions can actually lead to more creative, nutritious, and flavorful treats. From the rich, velvety chocolate avocado mousse to the fluffy coconut flour cupcakes and protein-packed energy balls, each dessert offers unique benefits while satisfying your sweet tooth completely.
Ready to transform your dessert game? Try one of these gluten free and dairy free desserts this weekend and share your results in our comments section below. Don’t forget to subscribe to our blog for more innovative, health-conscious recipes that prove you never have to compromise on taste for better nutrition.
FAQs
Q: Can I make these gluten free and dairy free desserts ahead of time for parties? A: Absolutely! The energy balls and cupcakes are perfect make-ahead options. Energy balls can be prepared up to a week in advance and stored in the refrigerator, while cupcakes can be baked and frozen up to a month ahead. The avocado mousse is best made 1-2 days before serving for optimal flavor and texture.
Q: What’s the best way to ensure my gluten free desserts don’t taste “gritty”? A: The key is proper ingredient preparation. Always sift coconut flour, use ripe avocados, and don’t overmix batters. Additionally, letting your ingredients come to room temperature (except where specified otherwise) helps create smoother textures in your gluten free and dairy free desserts.
Q: Are these gluten free and dairy free desserts suitable for people with nut allergies?
A: Yes! The chocolate mousse and cupcakes are naturally nut-free. For the energy balls, simply substitute the peanut butter with sunflower seed butter or pumpkin seed butter. Always check your ingredient labels to ensure no cross-contamination has occurred during manufacturing.
Q: How can I tell if my coconut flour cupcakes from gluten free and dairy free desserts are done baking?
A: Insert a toothpick into the center of a cupcake – it should come out with just a few moist crumbs attached. Coconut flour continues cooking slightly after removal from the oven, so err on the side of slightly underdone rather than overbaked.
Q: Can I reduce the sugar content in these gluten free and dairy free desserts without affecting texture? A: Yes, but make adjustments gradually. Start by reducing sweetener by 25% and taste-test. For the mousse and energy balls, you can substitute with stevia or monk fruit. For cupcakes, the maple syrup provides moisture, so if reducing significantly, add an extra tablespoon of coconut milk to maintain texture.
Q: What’s the shelf life of homemade gluten free and dairy free desserts compared to store-bought? A: Homemade versions typically last 3-5 days when properly stored, compared to weeks for commercial products loaded with preservatives. However, the freshness and flavor of homemade gluten free and dairy free desserts far surpass store-bought alternatives, making the shorter shelf life worthwhile.
How Did It Go?
There are no reviews yet. Be the first one to write one.
